Thursday, April 17, 2014

Time goes...

Wow... 6 months... It is 6 months ago I wrote last. Time sure goes by fast!! Well I'm alive and happy, more than ever if that's possible! And I'm busy, as ever!

Apart from school attendance, trip to Canada for Christmas, work placement in a daycare center (Which I just completed), renovation of our dining room and kitchen, enhancement of the greenhouse, etc etc... I have been working on my greatest and most precious creation to date, and it has taken a LOT of my energy. We indeed found out at the end of October that we are expecting our first child! Words can not describe the happiness we feel. Our little one is due for July. What a special summer this will be. :)

But tired or not... bump or not... the brand new greenhouse, which we spent all Spring 2013 installing, can not remain empty all summer! What a shame that would be! So I managed to sow a few things and we (mostly my wonderful husband) added a couple of enhancements.

First, I now have a "sink" in the corner. It's basically just a grid over a cement bassin and a drain. Eventually, there will also be running water with a faucet and a hose right above the drain area.


And then we added a table and a shelf! It is now so much easier to work in there and organise my tools and whatnot. :)


Happy Easter weekend to everyone! I know that Canada and US are having a really long winter, so I'm sending you guys some nice warm rays of sunshine! Hopefully the Easter Bunny comes with Spring in his basket this year!

Tuesday, October 15, 2013

Dried Mangoes

My wonderful husband gave me a dehydrator this week for my birthday!! How spoiled am I!?! We had talked about it months ago, when we wondered how much cheaper it would be to dry our own mangoes, as we both LOVE them as a snack.

So you can imagine that I was very excited to try my new toy, and since it came with a few mangoes (hehehe... cute touch), those were the first to get cut and put in the machine.

My new dehydrator
The first batch dried a lot faster than I had anticipated (according to google), but I had cut the pieces too thin. So I pretty much made mango paper! It tasted good, but it looked pretty weird.

So I tried again and this time cut the pieces thicker. I also added a row of apples, just out of curiosity.

ready to dry

This batch took many hours to dry, but the result was divine! Dried mangoes are like fruit candy, but there's absolutely nothing added to them. It's just the natural sugars that become more concentrated. They really are difficult to resist, and it's definitely a case of can't-eat-just-one!

Yummy and healthy "candy". Best snack ever!
Out of my two mangoes, I got at least 3 times the amount I would get in a small bag from the store. It also cost a fraction of the price.

My husband calculated that the required energy / electricity (3.5kWh) for this batch cost about 8 DKK (Danish Crowns). We paid 5 DKK each for the mangoes. That gave a total of 18 DKK.
Divided by 3 would be 6 DKK for about the same amount I would get in a store for 20 DKK or more.
(click here for currency converter)

Plus, I know that nothing has been added - especially if the mangoes are ecologic of course, which I can't say mine were. Shame we can't grow them in Denmark!

There are so many possibilities with the dehydrator. One can dry fruit, veggies, herbs, berries, mushrooms, etc. From what I gathered, dried goods retain most of their nutritional value and can be stored for many months. I think it could be a great way to save surplus harvest. Dried fruit and berries can be used as snacks, in cereals, porridge or in desserts. Dried veggies, mushrooms and herbs can be used in cooking of course. It seems like a good way to use one's own harvest even in the cold season. The device came with 3 trays, but I can stack up to 10 trays! Only issue is storing the thing when not in use! ;)

Huge thanks to my husband. *muuaahh!* This is a very nice addition to my gardening hobbies! (please don't eat all the mangoes... ) ;)

Saturday, October 05, 2013

Fall harvest

September came and went nearly without me noticing! I have been on "back to school" mode after a fantastic summer in the garden. The program I am taking (bachelor degree in social education) is very interesting. It is also challenging and demanding, but I still manage to spend a few hours outside every now and then. It's really good for the head after reading pages of theory. ;)

Fall is so beautiful and cosy in its own special way. Some trees and plants take on beautiful vibrant colours. Other plants just fade and wilt away. Many will sprout again next year with the next warm season.
The air is becoming cool and brisk, and warm blankets are just cosier and cosier. The land is getting ready for the cold season, but that doesn't mean that nothing is happening in the garden. Here's a few examples of what's been going on...

My chili plants gave a LOT of chilies (and still do!) so I made some chili oil (not shown on picture) and chose to hang some chilies to dry. (I also have a basket full apart from those shown here)

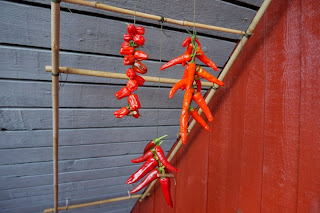
Chilies hanging to dry

One of my favorite part about Fall is winter squash harvest! They are just so pretty, delicious and healthy! My pumpkin plant gave 7 pumpkins and my hokkaido plant gave 3. I have been turning some of them into delicious Fall cream soup. There is a recipe *here*. I would also like to make one or two pumpkin pies, using my grandmother's recipe, which I was so lucky to have sent to me a couple of weeks ago!! :)

Pepo pumpkins (what I call "Halloween" pumpkin),  and small Hokkaido squash (also called Red Kuri squash)

Our apple tree was not very productive this year, but I was allowed to pick apples at my friends garden and came home with 7 kilos of huge delicious ones!

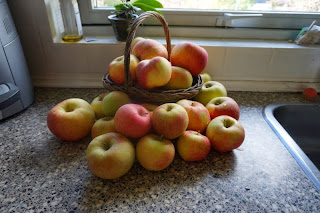
7 kilos of apples. A huge thanks to my friends :)

So on a nice Saturday afternoon, I set out to work peeling all this lot. 

I sat in the greenhouse to peel the apples. It was so comfortable out there. 
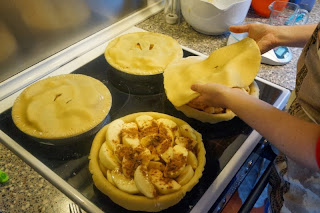
I then turned all this into yummy pies. I used the same recipe as I did last year. If you're curious, you can find it by clicking *here*.

yum!
Last year, I managed to bake 4 pies out of the apples from our apple tree. This year, the 7 kilos of apples allowed me to bake 8 pies!

Apple pie production 2013: 8!

The tomato plants in the greenhouse are currently maturing the few last fruits of the year. Despite some issues earlier in the season, where the tomatoes would rot before having time to mature, I harvested many delicious and healthy tomatoes and enjoyed many tomatoe-basil salads. 

I have also been clearing things out from the vegetable patch. Some things unfortunately were attacked by meldew, others were just done and ready to get cleared out. I however left some of the beans on the plant with the idea to let them dry. I will then harvest and keep the beans / seeds for use next year. Some of them I simply picked up and hung in the greenhouse to dry, as I was afraid they would rot before time if they were left outside. With the empty soil space, I followed my friend's advice and put down some plants I had that were still in pots. They will be better off spending the winter with their feet in full soil, and I can move them early next year before the patch is needed again for vegetables. 

The season is coming to an end, and I am already looking forward to the next season! Thankfully, it's only a few months of waiting, as the first sowing can happen indoor in february with chili plants!

Hmm, but until then, I'll have to take up my winter hobbies! :)

Saturday, August 24, 2013

Ambiance lighting

I love my greenhouse. This is no surprise to anyone who knows me, but what you guys may not know is that my husband has an interest for electronic projects and a ton of great ideas. I am so lucky that my greenhouse inspired him to work on one of his awesome ideas. This resulted in a greenhouse with a personality!

This ambiance lighting is a waterproof strip of LED lights mounted in the highest point of the ceiling. The strip is connected to a battery, which in turn is connected to 2 small solar panels. We can choose the intensity and colour of the light with the help of a small remote control.


Thanks to my wonderful husband for putting together and installing such an awesome lighting in my green atelier. :) Muaah!

Crops

Not everything is working out as I would like in the greenhouse and garden, but we still get to enjoy some really yummy things. Here are a few examples:

I have two kinds of chilies. The one shown on the picture is only called "capsicum annuum" on the seed envelope. From what I understand, this is the common name to many sorts of chilies, so I am not sure which one this is. It does look like jalapeno tho, and is also quite strong. I also have smaller chilies (Apache), which are even stronger. So chilies have it good in the greenhouse! Next year, I want more sorts!
Strong chili
I sowed green and yellow beans out in the garden this year as I had last year. In addition, I received from a good friend, early in the season, seeds for 3 other kinds of beans. I unfortunately don't know their names in English. (And Google is a bit confused itself, it seems).  In any case, they are growing great and we have eaten quite a few of them in the past few weeks! Beans are also staying on the plan for next year!

3 kinds of beans, which I don't know name of in English
(Pralbønner, Borlotti bønner, Lilla bønner)

My corn last year didn't give any decent crop. I only had 3 surviving plants and the conditions were not ideal. This year, I started my plants differently and had better success. These are some of the first cobs we harvested. They are not perfect looking, but they tasted good enough! :) Another one going back on the list for next year.
Green and yellow beans. Sweet corn.

I've had some issues with my tomatoes. A lot of them develop a problem known as "blossom-end rot", where the fruit rots at the bottom while still on the plant, and before it even has time to mature. This, I've now learned, is caused by a lack of nutrients. One of the problem is that I have too many plants per soil bag. I also did not feed the plants as I should have through the season. Learning comes with a cost. :(  However, since I started fertilizing my plants, I managed to save some of my crops. Lately, I enjoyed many lunch times with fresh and delicious tomatoes, mini-cucumber and basil from the greenhouse.

A few sorts of tomatoes, mini cucumber, red and green basil. 

Mmmmm now I'm hungry again!

Thursday, August 08, 2013

Painting in the greenhouse

One of the many things I was looking forward to with a greenhouse was the possibility to sit outside while still protected from the elements. The summer has been very warm and sunny here in Denmark, so I did not sit out in my greenhouse so often. It was much too warm in there! Today however, we lost some degrees on the thermometer. The sky is covered and the wind blowing. It was the perfect day to enjoy a bit of creative time out in my outdoor, bright - yet protected - workshop.

It had been a very long time since I last painted, so I took my material out, installed a little work area, put on some music and started painting.

Peaceful... inspiring... delightful. 
My singer of choice to listen to while I paint is Yves Duteil, a French singer songwriter. His texts are just so beautifully written. French is such a beautiful language. No matter how many languages I might come to learn in my life,  my mother tongue will always be the most inspiring one to me. Listening to Yves Duteil's music always brings me into a creative mood. It brings me within myself and within my heart. Time disappears as my hands get busy with colours and paintbrushes, and images gradually take shape on the canvas.

Here is what today's adventure resulted in.

Watercolours on canvas - (c) Marie-Eve Cormier

My favorite way to paint is when I start without the slightest idea of what to put on the canvas. I let the music surround my heart, I let my thoughts run free and I let the colours speak to me. I add to the creation until I look at it and decide that it's done. My paintings are often nameless, and the only story they have is what they might evoke in the heart of the one looking at them. Abstract art is so open and free that way.

Wednesday, August 07, 2013

Clay from my garden

In a recent post, (here) I mentioned the clay I dug up from my garden and how I started to clean it up to make it ready for use. Here is the description of the process from start to finish. 


- Dig up some clay soil. 

Clay from my own backyard

- Put some chunks of clay soil in a container up to about half. Add water to fill the container.


Chunks of clay soil + water

- With your hands, break the chunks down until a homogeneous texture is obtained.

Homogeneous texture / mixture

- Let the mixture settle for a day or two. The heavy sand / rocks will fall to the bottom, the clay will sit over the debris and the water will be on top. In the case of the clay I gathered, there were so little debris that my mixture only seperated into 2 layers.

Settled clay-water mixture
- Get rid of as much of the clear water as possible by very gently pouring it out or scooping it up. When clay starts mixing with the water being removed, stop. The mix can be set to settle another day and the process of removing water can be repeated until no more water sits on top after the settling period. 

- When as much water as possible has been removed, pour the mixture through a sieve. I used a piece of bug net mounted on top of a clean bucket. This will insure that leftoever debris such as small pieces of roots or small stones are removed.


- The filtered liquid clay is ready for the last part of the process. Choose a surface that breathes well. I chose a metal grid shelf so air could also come from under. Cover the chosen area with many layers of newspaper, and finish with a piece of cotton. (an old pillow case, for instance).

- Pour the liquid clay onto the prepared surface. Let it rest for a few days, changing the newspaper daily. The clay will be ready when it can be picked up and shaped into a ball. This step can take several days, all depending on the amount of water in the mixture and how well ventilated the area is. 


Clay "drying" after having been cleaned of debris.
- When the clay has the desired texture, it can be picked up, shaped into a ball and stored in an air-tight plastic container or plastic bag. 


Tadaaaah!!